Vogels PFW 6852 User Manual Page 10
- Page / 17
- Table of contents
- BOOKMARKS
- INSTALLATION INSTRUCTIONS 1
- 300 lbs 2
- Parts List 3
- Installation Tools 3
- Parts List (cont’d) 4
- Features 5
- Installing the Swingout Arm 6
- Introduction 6
- Mount Orientation 6
- Nose Piece Orientation 7
- Concrete Installation 8
- Wood Stud Installation 8
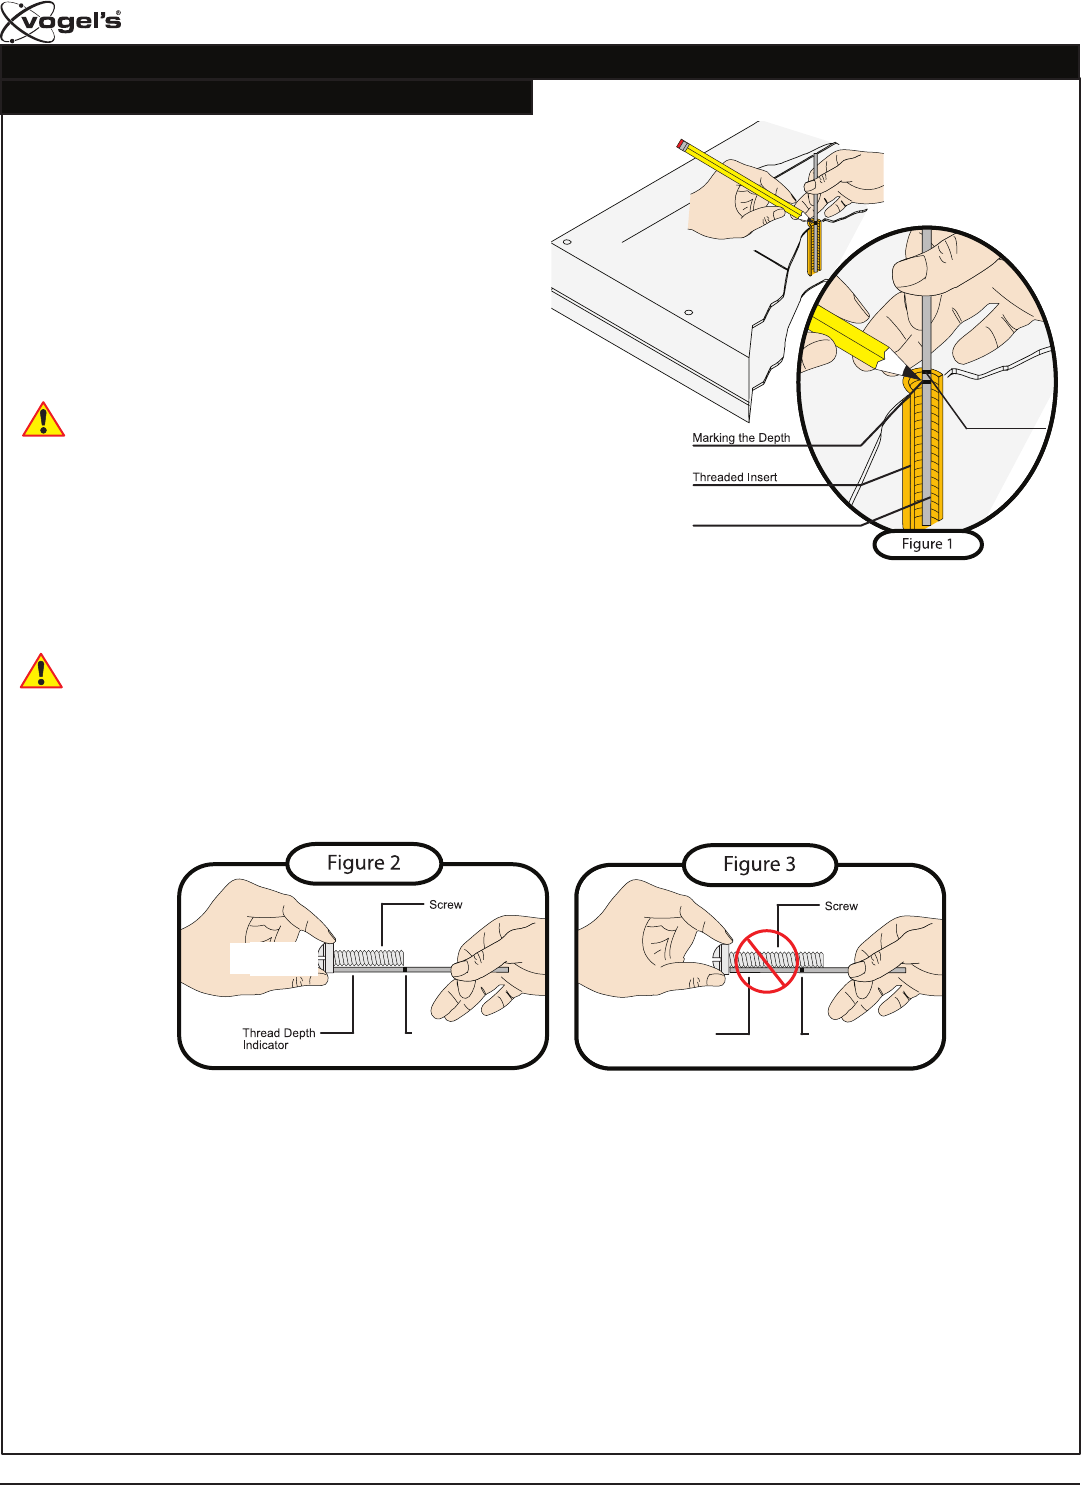
- Mounting Hardware Selection 10
- Griplate™ Washer Installation 11
- Nylon Spacer Installation 11
- Mounting Bracket Installation 12
- 16″ at washers 13
- Fine Tuning & Adjustments 16
- Tilt Positioning 16
- Cable Management 16
- Technical Specications 17
Related products and manuals for Accessories for video Vogels PFW 6852
 (10 pages)
 (2 pages)
 (4 pages)
 (4 pages)
© 2020, manymanuals.com. All rights reserved. | 2.790 s |
 Manymanuals.com
 Manymanuals.de
 Manymanuals.fr
 Manymanuals.it
 Manymanuals.pl
 Manymanuals.cz
 Manymanuals.es
 Manymanuals-pt.com
Comments to this Manuals